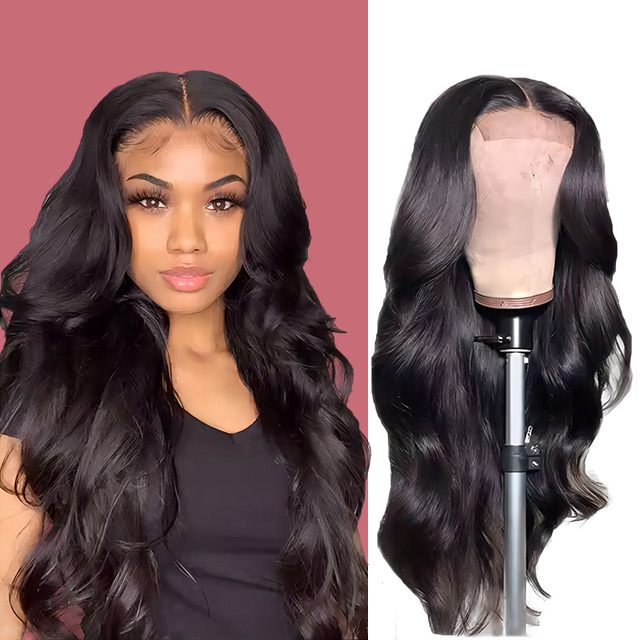
Investing in a premium human hair wig only to end up with a helmet-like silhouette at the crown frustrates many wearers. A closure covers a small section for the middle or side part. Getting that specific area to lay flat dictates the success of the entire install. Bulkiness in a lace closure wig rarely stems from defective hair. It usually points to incorrect cap sizing, a thick foundational braid-down, dense factory knots, or skipped heat training at the roots. Fixing this requires a systematic approach. We will break down the technical steps to flatten these units. You will learn pre-installation customization, structural cap resizing, and texture-specific maintenance protocols to achieve a flush fit.
Foundation Dictates Silhouette: A bulky braid-down will inevitably push the wig cap upward, making even the thinnest lace look puffy. Compression is mandatory.
Cap Sizing is Non-Negotiable: Excess lace or a cap that is too large will bunch and bulge at the crown. Structural resizing must occur before styling to avoid a "wig too big" mishap.
Customization is Required: Factory-standard closures often feature unnatural density. Strategic plucking and knot bleaching reduce visual and physical bulk.
Heat Training is the Standard: Utilizing a hot comb paired with wax sticks is the industry-standard method for forcing the roots of the closure to lay completely flat.
Diagnosing the Root Causes of a Bulky Lace Closure Wig
A successful install results in a closure that sits flush against the scalp without visible ridges, bunching, or unnatural elevation at the parting space. Identifying the exact structural failure point before applying adhesive saves hours of corrective styling. You must evaluate the physical components of the unit and the foundation beneath it. Ignoring these foundational elements guarantees a bulky, unnatural finish.
Incorrect Cap Sizing and Structural Bunching
Evaluate the dimensions of the wig cap against the wearer's exact head measurements. Excess material in the cap creates folds that push the closure upward, resulting in a bulky crown. This structural flaw ruins the silhouette regardless of your styling efforts. Identify signs that a wig is structurally too large before altering the lace. Overlapping lace at the temples indicates excess width across the front. A unit sliding backward or buckling at the nape points to excess overall circumference. You must correct these sizing issues internally before attempting to flatten the exterior hair fibers.
Measurement Area
Small Cap (Inches)
Medium Cap (Inches)
Large Cap (Inches)
Circumference
21.5
22.5
23.5
Front to Nape
13.5
14.5
15.5
Ear to Ear (Across Forehead)
11.0
11.5
12.0
Ear to Ear (Over Top)
12.0
12.5
13.5
Poor Foundation and Braid Down Density
Natural hair density beneath the wig dictates the final exterior shape. Thick, uncompressed natural hair acts as a wedge against the lace foundation. Standard, bulky cornrows fail to distribute hair weight evenly across the scalp. They create high points and low points that the lace must stretch over. Micro-braids or flat anchor braids provide the necessary compression to eliminate these ridges. A completely flat base ensures the lace sits tightly against the skin, allowing the hair fibers to fall naturally without being pushed upward by the hair underneath.
Over-Dense Factory Knots and Hairlines
Manufacturers ventilate closures using specific knotting techniques to ensure durability. High-density knotting often concentrates 150% or more density directly at the root. This creates a physical wall of hair that naturally resists laying flat. Factories often use double knots at the crown to prevent shedding, which adds physical bulk to the lace base. Higher density offers longevity and reduces shedding over time. However, this trade-off requires manual thinning to achieve a flush, realistic parting space. You cannot flatten a wall of double-knotted hair with heat alone; you must remove some of the bulk physically.
Pre-Installation: Customizing Closure Lace Wigs for a Flat Lay
Customization must happen off the head to ensure precision and prevent damage to natural hair. Working on a canvas block allows you to manipulate the lace safely, apply tension with T-pins, and view the density from multiple angles before the install begins.
Strategic Plucking and Root Thinning
Use precision tweezers to thin the hairline and the parting space systematically. Plucking removes excess bulk from the immediate root area, allowing the remaining hair fibers to lay closer to the lace. Over-plucking can lead to premature balding of the closure, ruining the unit entirely. Mitigate this risk by plucking slightly behind the front hairline rather than directly on the edge.
Mount the wig securely on a canvas block head using T-pins.
Apply a light mist of water or styling foam to the hairline to group the hairs together, making the knots highly visible.
Part a thin section of hair about a quarter-inch behind the front hairline and clip the front hair forward.
Hold your tweezers at a flat angle against the lace and pluck in a skipping motion (pluck, skip, pluck) to avoid creating bald patches.
Frequently hold the lace up against a strong light source to gauge your density reduction accurately.
Resizing the Wig Cap for a Flush Fit
Alter a wig cap that is too big using actionable glueless wig hacks. Fold and sew the tracks at the nape to reduce the overall circumference without cutting the structural bands. Adjust the internal elastic tension bands for a snug perimeter fit around the ears and neck. Tightening the perimeter pulls the closure taut across the top of the head. This perfectly solves center bulging and prevents the delicate lace from buckling when you move your head. If the cap has adjustable straps, cross them over each other at the nape for maximum tension.
Bleaching and Setting the Knots
Bleaching knots creates a highly realistic scalp illusion by removing the dark pigment at the base of the hair. The chemical process also slightly weakens the root of the hair fiber. This structural change makes the hair much more pliable and easier to press flat during installation. Apply the bleach mixture carefully using a light hand to avoid over-processing the delicate lace material or causing severe root breakage.
Mix a high-quality powder lightener with 20-volume or 30-volume developer until it reaches a thick, frosting-like consistency. Runny bleach will seep through the lace and dye the hair shafts.
Apply the mixture gently to the underside of the lace using a butter knife or a flat color brush. Do not press down hard.
Process for 15 to 25 minutes, checking every 5 minutes. The knots should turn a brassy blonde or light brown.
Rinse thoroughly with warm water and immediately apply a neutralizing shampoo to stop the chemical reaction.
The Foundation: Prepping Natural Hair for Maximum Compression
The goal is maximum flatness without causing traction alopecia or scalp tension. Proper prep work ensures the unit remains secure, flat, and undetectable throughout daily wear. A poor foundation will ruin even the most customized wig.
The Anchor Braid Method
Execute a straight-back braid pattern for optimal foundational results. Incorporate small, flat anchor braids directly at the front hairline to secure the front of the unit tightly. Sew down the ends of the braids flat against the back of the head rather than tucking them underneath other braids. Tucking creates a hard, elevated lump at the nape. This lump can shift the entire wig forward, disrupt the lace positioning, and create a bubble at the crown. Use a curved needle and nylon thread to stitch the braid tails flat against the scalp.
Utilizing Wig Caps for Surface Smoothing and Security
Use thin, nylon wig caps to compress the braids tightly against the scalp. Wig caps are essential for securing large wigs in place and preventing natural hair from moving. Movement underneath the cap disrupts the lace foundation and causes the closure to lift. Implement the bald cap method using holding spray or gel to freeze the cap directly to the skin. This creates a completely smooth, frictionless surface for the lace to sit on, eliminating any remaining texture from the braids.
Place a thin HD nylon wig cap over your braided hair, pulling it down past your natural hairline.
Spray a strong-hold freezing spray directly over the hairline, saturating the cap material.
Use a blow dryer on the cool setting to dry the spray completely until the cap is hard and frozen to the skin.
Carefully cut away the excess cap material from the forehead and ears using small cuticle scissors.
Apply a layer of powder foundation that matches your skin tone over the cap to blend it seamlessly.
Installation Techniques to Eliminate Crown Bulk
Product application and heat tools must work in tandem to manipulate the direction of the hair cuticles directly at the root. Mechanical force combined with thermal styling is required to break the factory set of the hair and force it to lay flat against the scalp.
The Hot Comb Method (Heat Training)
A standard flat iron cannot reach close enough to the lace foundation due to its bulky plates. An electric hot comb is required to press the roots completely flat. Heat the comb to 350°F–400°F depending on the specific hair texture and density. Burning the lace or melting synthetic structural threads is a severe risk during this step. Mitigate this by testing the temperature on a back track first and moving the comb continuously through the closure. Use the back of the hot comb to press down on the hair, rather than just combing through it.
Hair Texture
Recommended Hot Comb Temperature
Pressing Technique
Straight
380°F - 420°F
Heavy pressure, slow passes using the back of the comb.
Body Wave
350°F - 380°F
Moderate pressure, focus only on the top 1.5 inches.
Deep Wave
300°F - 330°F
Light pressure, quick passes to avoid straightening the curl.
Water Wave
300°F - 320°F
Minimal heat. Rely mostly on wet styling and foam wraps.
Strategic Use of Styling Mousses and Wax Sticks
Wax sticks play a crucial role in taming flyaways and adding necessary weight to the roots. They provide the hold needed to keep the pressed hair flat against the scalp. However, over-application of wax causes greasy buildup and attracts daily dirt. This buildup eventually makes the roots stiff, dull, and extremely bulky. Emphasize a strict "less is more" approach when applying heavy styling products to the closure area. Swipe the wax stick lightly over the parting space once, then use the hot comb to melt the wax into the hair cuticles.
Tying Down the Lace for the Final Melt
Use a wide elastic melt band immediately after heat styling the roots. The band applies firm, even pressure across the entire closure area. This physical compression locks the flattened roots in place while the hair cools down and sets. Leave the melt band on for at least fifteen to twenty minutes for the best structural hold. Do not remove the band while the hair is still warm, as the cuticles will expand and the roots will puff back up.
Texture-Specific Strategies for 5x5 Lace Closure Wigs
Different hair textures require distinct handling to maintain their pattern while keeping the closure area flat. The 5x5 closure size offers deep parting but requires careful volume management across a wider surface area. You cannot treat a curly unit the same way you treat a straight unit.
Managing a 5x5 Straight Lace Closure Wig
Focus entirely on sleekness and structural alignment. Straight hair shows bulk and track bumps much more easily than highly textured hair. Emphasize heavy heat training at the crown using your hot comb in small, precise sections. Apply lightweight serums over heavy waxes to maintain a fluid, natural swing without weighing down the mid-lengths. A 5x5 straight lace closure wig demands precision pressing to avoid a stiff, helmet-like appearance. Part the hair in quarter-inch sections and press each section individually for maximum flatness.
Taming a 5x5 Body Wave Lace Closure Wig
Maintain the wave pattern through the mid-lengths and ends while keeping the root area controlled. Keep the top two inches of the closure bone-straight and completely flat using targeted heat. Use a wide-tooth comb to detangle the lengths without disrupting the delicate wave structure. Apply a lightweight styling mousse to define waves without adding unwanted root volume. A 5x5 body wave lace closure wig requires a careful balance between flat roots and voluminous, flowing ends. Avoid brushing the waves when dry, as this causes the hair to expand and puff up toward the crown.
Controlling Volume in a 5x5 Deep Wave Closure Wig
Deep wave hair naturally tends to poof and expand as it dries. This natural expansion leads to severe bunching and bulging right at the lace perimeter. Highlight the necessity of weekly deep conditioning treatments to keep the cuticles smooth. Use water-based leave-in conditioners to weigh down the roots naturally without causing heat damage. Proper moisture control preserves the tight curl pattern and keeps a 5x5 deep wave closure wig looking natural and flat. Apply products while the hair is soaking wet to lock in the curl definition before it has a chance to swell.
Hydration Protocols for a 5x5 Water Wave Closure Wig
Water wave textures require constant, daily moisture application to maintain their definition. Without proper hydration, the closure will quickly look like a dry, bulky sponge sitting on top of the head. Detail the wet look styling method for daily maintenance. Use a continuous spray bottle and a high-quality curl-defining cream to saturate the hair. This specific combination keeps the 5x5 water wave closure wig flat, highly defined, and completely frizz-free. Avoid heavy oils, which sit on top of the hair shaft and create a greasy, matted look at the roots.
Long-Term Maintenance to Prevent Bunching and Bulging
Maintaining a flat wig requires ongoing structural care and proper handling between installs. It is an ongoing process, not a one-time fix achieved on installation day. Neglecting the unit after taking it off will reverse all your heat training and customization work.
Proper Storage Protocols
Storing a wig stuffed in a bag causes the roots to crush and fold. This bends the hair fibers unnaturally and creates permanent bulk that is difficult to press out later. Store the wig on a canvas block head or a dedicated wig stand when not in use. This preserves the flat crown, maintains the overall cap shape, and protects specific curl patterns from friction. If you must travel, turn the wig inside out and gently roll it, placing a hair net over the lace to keep the roots pointing in the correct direction.
Washing and Drying to Preserve the Foundation
Wash the wig carefully without vigorously scrubbing the delicate lace base. Scrubbing causes the hair to tangle, invert through the lace, and bunch tightly at the root. When handling closure lace wigs, always wash the hair in a downward motion, keeping the water flowing from the roots to the ends. Advise air-drying the unit naturally on a stand in a well-ventilated area. This keeps the hair fibers in optimal condition for future styling. Explicitly warn against using a hairdryer blowing upside-down. This forces the roots to stand straight up and completely ruins your previous heat training efforts.
When to Utilize Lace Wig Fitting Customer Support
DIY methods fail when the lace is fundamentally warped or the cap is structurally defective out of the box. Stop altering the unit if you notice severe sizing discrepancies before cutting the lace. Document any sizing issues with clear, well-lit photographs immediately. Contact lace wig fitting customer support for professional guidance. They can assist with professional resizing advice, facilitate direct exchanges, or process valid warranty claims before you void the return policy by bleaching or plucking the unit.
Conclusion
Assess your current braid-down technique and immediately switch to flat anchor braids to eliminate foundational ridges.
Measure your exact head circumference, front-to-nape, and ear-to-ear dimensions to ensure proper cap sizing before your next purchase.
Invest in a high-quality electric hot comb with adjustable temperature settings for precise root pressing.
Purchase a lightweight wax stick to assist with root compression without causing greasy buildup over time.
Implement a strict storage routine using a canvas block head to maintain the flat crown between installations.
FAQ
Q: Why does my lace closure wig look puffy at the top?
A: Puffy closures happen due to dense factory knots, skipped heat training, or bulky natural hair underneath the cap. Thick cornrows push the lace upward. You must compress your natural hair, thin the closure density with tweezers, and use a hot comb to press the roots flat against your scalp.
Q: How do I make a wig cap smaller to stop the lace from bunching?
A: You can fix a wig that is too big using the fold-and-sew method. Pinch the excess track material at the nape of the neck, fold it over, and sew it flat. Additionally, tighten the internal elastic bands to pull the perimeter taut and eliminate lace bunching.
Q: Can I flatten a curly closure wig without ruining the curls?
A: Yes. Use a hot comb exclusively on the first inch of the root near the lace. Leave the rest of the hair shaft untouched to preserve the curl pattern. Utilize deep conditioning and water-based leave-in creams to naturally weigh down the roots without applying excessive heat.
Q: What is the best braid pattern under a closure wig?
A: The straight-back anchor braid method provides maximum flatness. Create small, tight braids starting directly at the front hairline. Sew the ends of the braids flat against the back of your head instead of tucking them, which prevents hard lumps at the nape.
Q: How often should I use a hot comb on my closure?
A: Use a hot comb only during the initial installation or immediately after washing the wig. Daily use causes severe heat damage, leading to breakage and flyaways that create more bulk. Maintain the flatness daily by tying the lace down with an elastic melt band at night.
Q: Does a 5x5 closure lay flatter than a 4x4 closure?
A: No. While a 5x5 closure offers deeper and wider parting space, flatness depends entirely on customization and installation technique. Both sizes require proper plucking, knot bleaching, and heat training. The lace dimensions do not automatically guarantee a flatter install without proper foundational prep.
We are always ready to assist you with your inquiries. You can contact us via email or WhatsApp, and we will make every effort to help resolve your issues and meet your needs.